Welcome & How to Get Help During the Lab
Cole Padula: Here, everybody super excited. Um, can you just confirm via Slack, do you want me lead starting now and then jump into the video. Just say yes or.
All right, what's up West Coast team, super excited to be, uh, to be, uh, doing for this for you today. Um, if you have any issues, anything that pops up during the, uh, during the hands-on lab, please use our chat. Reach out to, uh, Eric. Um, we'll get it sorted on the back end here. Um, before we go ahead and get started, uh, we'd like to play just a quick video outlining the, the details of our mission.
Perfect.
Mission Briefing: Insider Threat + Princess Hologram Exfiltration
Cole Padula: So our first mission, you are all going to play the role of the insider threat. Um, today our mission for you is to retrieve the princess hologram. Um, our, our scenario is you've gone rogue. You're a member of the Rebel Alliance actively working for the Empire. Your mission is to smuggle out a confidential hologram without being caught, um, and trying to circumvent the controls that the Rebel Alliance has in place.
Um, you're going to simulate an insider, data threat exfiltration. Um, you're gonna observe, uh, specific DLP policies during this, uh, during this mission. To go ahead and get things kicked off.
Step 1: Find Credentials, Get Files from Google Drive
Cole Padula: Um, you're going to go ahead and you're going to locate your rebel user and password, which is actively stored in a text document on your, on your desktop.
Once you have that located, you're going to open up Google Drive. Um, from Google Drive. You're gonna use that same exact username and password that is stored in the text document to access where the hologram is located.
Once you've gone ahead and logged into Google Drive, you're going to access the secret files, uh, folder. Uh, within, um, within Google Drive, you're going to download a hologram document and the zones categorization project notes file. Both of these should be stored in that, those exact locations.
Again, you're going to access the Google, uh, you're gonna access the user account that's stored within that text document. If you're going to use those login credentials to log into Google Drive, uh, and you're going to access those two files to, uh, uh, the zone ation notes file and the hologram file that is located within, uh, that drive location.
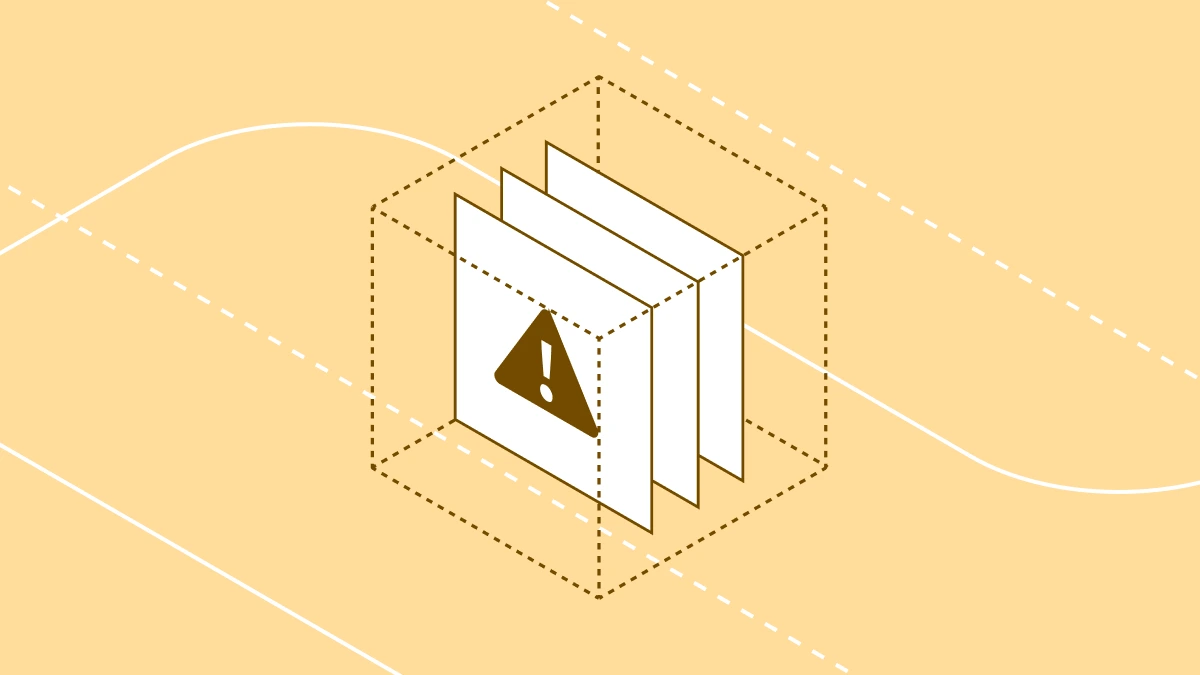
Please remember, um, please note your, your rebel number during, uh, throughout the duration of this course, as you will be coming back to it a few different times. Once you have that file downloaded, um, you're going to rename the secret hologram document to HT access, and then you're going to zip that document so you're effectively going to holding for you Ty Questions, fire away.
Use that q and a or Alicia, come off, come off mute and ask them in the zoom.
Yeah. Loud and clear.
That, that email and password is stored in the text document, um, which is located on your desktop. It's, this
TY Pivec: sounds good.
Cole Padula: All right, we looking good, Alicia?
Fantastic. So once you've located those documents, Ooh, Alicia, I'm just gonna mute you
there. We.
Awesome. And just as a side note, we have Fernando in our Zoom now, um, and he can answer any questions, uh, async as well.
Rename + Zip the Hologram (.htaccess) — Hands-On Troubleshooting
Cole Padula: Um, so once you've located those two files, um, you're going to download those to your, to your endpoint, um, by selecting each of the, each of the files, uh, individually, uh, and then performing a simple download action.
Once those files are downloaded to your device, you're going to locate the secret hologram, uh, file. Um, as you can see here on our slide, um, it's gonna be labeled secret hologram html. You're going to rename that file to period HT access, um, effectively stripping the existing extension, and then once you've renamed that file to HT access.
You're gonna go ahead and zip it using the native compression, uh, capabilities within, um, the Windows operating system.
So again, you're going to locate that secret hologram HTML file. You're going to rename it to HT access, and then you're going to compress it
once that file has been compressed.
You're going to open up GitLab, which is another bookmark on your desktop. You'll see it as step two, GitLab. Um, so go ahead and navigate to your desktop and open that up. Alicia, I hear you off. Come off mute.
Yeah, no worries. How about this, uh, Alicia?
Um, 30 seconds in between, 30 seconds in between steps. Okay.
Alicia, quick question for you is, is my audio coming through okay? Do I need to talk louder? Okay. Okay.
Yes,
no worries.
Wish I could annotate, but um, Matt, what I'm gonna have you do is click on that manila folder, um, in Yeah, yeah. It looks like you just opened up File Explorer, um, towards the bottom of your screen and there it is. There it is. Make, go ahead and, uh, yep.
Oh, it keeps, when it goes to open it in the folder, it brings 'em to the HTML document. Um, map instead of clicking on the folder. There you go. Yeah. So then you'll zip up that H TM L doc, um, and you'll rename it to.ht access. Rename it first and then zip it up. Apologies, period. HT access. Lemme go ahead and rewind for you.
TY Pivec: That works. That works.
Cole Padula: Tom, I'm on, I'm on your screen now or if you're having trouble accessing the, uh, there you go. Yep. Go ahead and, uh, you can right click on that and do show more options.
Rename that works as well. And go ahead and remove the HTML at the end of that.
That works as well.
Alright, Tom, Brittany. Alicia on my side, it looks like everyone's caught up. Can you please confirm?
Fantastic.
Step 2: GitLab Snippet Upload (and the First Block)
Cole Padula: So after we've zipped up this, uh, this hologram document and, uh, zipped it into a, um, into a compressed drive, what you're going to do is on your, you're gonna go back to your desktop. Um, on your desktop, you're going to find an icon for GitLab. Um, with that, you're gonna go ahead and open that GitLab, uh, icon up.
It's a shortcut to gitlab.com. And then once you are within GitLab, you're going to, you're going to pass this quick security check to verify that you are a human. Once you verified that you are a human, you're going to authenticate using the Google authentication check towards the bottom of the, towards the bottom of the screen.
Um, it'll be right above GitHub.
I see people logging in.
Let us know if you have any issues passing the Google authentication check.
All right,
fan. Fantastic. Now that we've au, whoops. Now that we've authenticated into. Uh, into GitLab. Towards the top left hand side of our screen, there's a plus button that says, create New. You're going to go ahead and click on that Create new button, and from there you're going to choose new snippet again, in the top left hand corner within GitLab, once you've logged in, there's a plus icon that says, create New.
Once you click on Create New, you're gonna go ahead and click on Create New Snippet.
Within that snippet, what there's a, there's a description area that says description optional. There's an attach button towards the end of that ribbon. Looks like a little paperclip icon for our OGs out there. Kind of looks like Clippy. Go clippy. You're gonna go ahead and you're gonna click on that.
Attach a file or image button.
From here, you're gonna locate that HT access document that you created, and you're going to upload it Again, it's going back to the steps. Once you've created your new snippet,
you're going to click on the attach a file or image option, uh, within the description field. Once you've done that, you're going to locate the document that you've sipped and compressed, and from there you can go ahead and click open and upload it into GitLab.
Mm-hmm. And I'm seeing blocks left and right. We're stopping all these and Empire Moles.
Fantastic. As expected, you should have been there with a block. Uh, cyber Haven stepped in and prevented you from performing that action. However, we're a clever mos so we're going to find different ways to get around this.
Bypass Attempt: Upload to File.io Instead
Cole Padula: You're going to open up a new browser tab. Um, you can use the same one that you're using within GI for GitLab.
Um, for those that received that, for those that are still on the blocking message, go ahead and type any text and click I acknowledge into the, into the, uh, on that little blue icon in the bottom right hand corner of your blocking message. Uh, and then go ahead and open up a new tab and go to file.io. I io From here you're going to click on upload files.
You're going to locate. Zone categorization, project notes, document, and you're going to press open on that file.
So instead of utilizing the Princess hologram, you're going to use the zone categorization project document instead. Apologies if you hear any background noise. My kids are going absolutely wild.
Once you've selected that zone categorization project, the file should upload normally. So again, just a repeat, we're going to file.io. We're clicking upload files and we're selecting that zone categorization project document.
TY Pivec: Absolutely.
Cole Padula: Zone categorization, project notes document.
Awesome. Excuse me.
Sounds good. Awesome. So great job, exfiltrating. That notes document most, um, but next we're going to try and exfiltrate something else.
Try Exfil via Chat Tool (CHATT/Gemini) + Copy/Paste from Drive
Cole Padula: Um, this time we're going to utilize chat gt. Um, so again, either in the window that you're utilizing for file.io or um, in a new browser tab, you're going to navigate to chatt.com.
When you reach chatt.com, you're gonna get an option to log in, sign up for free, or stay logged out. You're going to click the small gray option for staying logged out again from file.io. We're going to navigate to chatt.com. We're going to select stay logged out on the CHATT login screen.
Yep.
TY Pivec: Oh, interesting. For, all right, hang on.
Cole Padula: So.
Okay, so we still have some people who don't have the say, logged out option.
Okay. Um.
Okay, so for those of you that are having issues with staying logged out on chatt, um, what I'm gonna have you do instead is go to gemini google com and then when.
Okay, so you're in with, you're in with Brittany. Okay.
Fantastic. Okay. So for those of you, oh, okay. Yeah, hang on. I'm just gonna, uh.
Fantastic. Awesome. Um, now that we've opened up the, so after we've logged, uh, stay logged out within chat pt, uh, you're going to navigate back to Google Drive. You're going to open up that note zone categorization, project kickoff document from within Google Drive. Um, what you're going to do is you're going to select a block of text.
Does not matter what block of text you capture, you're going to select that block of text, perform a copy event utilizing control C or a right click copy, and then you're going to paste that data into chat sheet. Bt. This action should be allowed. Um, and once we get into the, once we get into the Cyber Haven console, we're going to review all these flows of data.
Again, once we've copied that data from within Google Drive, you're going to open up that zones categorization, project kickoff document. You're going to copy a selection of text from that document and paste it into chat.
See folks still on the CHATT page? Quick check for me in seconds.
Awesome. So I know many of you are very familiar with the inner workings of the Cyber Human Console.
Demo Video: Cyberhaven Console, Incidents & Data Lineage Explained
Cole Padula: Um, what I'm going to do is for those who may not have, uh, gotten hands on with the solution in the past, I'm just gonna play a quick demonstration video going over everything that you're going to go through, uh, during this Hands-on Lab.
Alicia Khan: In this short demo, I'll walk you through how our platform helps organizations identify, investigate, and stop data exfiltration, not just by analyzing user actions, but by understanding the full journey of sensitive data. We'll start with a real world incident. Show how Cyber Haven traces data lineage and walk through how policies block violations in real time.
Let's jump in. We're starting here in the Cyber Haven console. On the incidents page, I already filtered this view to focus on a specific policy and a single user. This helps narrow things down when you're reviewing large volumes of events. I'll select this incident with P-I-I-P-C-I-P-H-I. Dataset flows via IT, admin, utilities policy, and the user stylists that gives us a focused view.
Now I'll click into this incident right here, and when I scroll down we can immediately see the file involved. Client list, export xlsx along with the date, time, and user activity. So far, this looks like user moved a spreadsheet containing sensitive data, but the real story is much more interesting. When I scroll into the event details, I see something unexpected.
The file we blocked wasn't the spreadsheet, it was a file called HD access. That might seem like a false positive, but let's expand the details here and look at the application used. It's curl and we can see the full command line. Silas used Curl to send this file to his personal GitHub repository. Cyber Haven captured the full command, including the destination URL.
Now, this is where data lineage becomes critical on the surface. HT access appears to be a benign configuration file, but if we click through the lineage view, we can trace the file's origin. Here you can see it started as the client list. Export xlsx downloaded from the CRM system renamed, and then uploaded as HT access via Curl.
Other tools would've missed this, but Cyber Haven ties every step together, giving you the full context. Now, let's zoom out and explore how partners and customers can work in the console. The powerful thing about the Cyber Haven solution is the ability to have visibility and the ability to search within that.
Whether you're troubleshooting or investigating, it's easy to filter by source data sets, policies, location, or users. The risk overview page is divided in three main sections. On the left hand side here we have data sets. This is what we consider to be sensitive data. This is how you identify sensitive data by its origin, its contents, or a combination of the two.
At the center are the policies we offer. Many ready to use options, or you can build your own from scratch. And on the right you can view insights into the data flow, including its origin, destination, and the users who access or interact with it. So let's say I want to see content inspection matches for P-I-I-P-C-I-P-H-I dataset.
I can click on the P-I-I-P-P-C-I-P-H-I data set and see all the policies triggered by it, along with a number of events associated with it. Over the last seven days, we see 16 events of PII markers uploaded to unsanctioned web mail, 10 events of flows to chat applications, two events of flows to USB devices and so on.
By selecting one of the policies and navigating to the events tab, we can view the two events associated with that data set and policy combination and explore them. What we've got here really is indications of risk being incurred by users over time, and what we do with that is we use that to calculate insider risk for your organization.
So this is a risk ranking of users within your environment. Cyber Haven stands apart because we track the journey of sensitive data across endpoints, apps, browsers, and the cloud. We don't rely on tags or red rejects rules, and we don't generate noisy alerts without context. Instead, we provide high fidelity incidents with complete lineage and root cause visibility so your customers can act fast and confidently.
This level of visibility provides instant insight into user behavior and intent, eliminating the need to bounce between multiple tools. For partners, that means faster time to value, easier deployment, and real demonstrable security outcomes.
Cole Padula: So now that we're familiarized with the Cyber Haven console, we're going to ahead and jump right in and start analyzing some of the instances and events that we captured. Uh, during your exfiltration attempts, um, you're going to see the power at your fingertips and see the realtime visibility, lineage tracking, and risk insights, um, all from within one place.
Um, but seeing the cockpit isn't the same as flying the ship. In the next mission, you're gonna take the controls and dive into a real incident. Um, as, as the analyst, you've seen that a sensitive file has surfaced in a suspicious location, your job is to investigate, interpret what happened, and understand why it matters.
This is where linear AI is going to come into play. This is your co-pilot incident response. You'll use Linea to reconstruct the event, identify the user's intent, take action to prevent it from happening again. This is the real strength of Cyber Haven, not just seeing the data movement, but understanding the story behind it and turning that insight into prevention.
Hands-On: Log Into Console & Filter Incidents by Rebel/Host
Cole Padula: So go ahead and get started. Um, going back to your desktops, there's gonna be a Cyber haven bookmark shortcut, uh, located that you can double click on.
Once you've located that icon, um, you should be able to log in directly to the Cyber Haven console. If you have any issues, please let Alicia know. Uh, Brittany, I see that you're on the login page currently. Alicia, anyone in the room having trouble accessing the Cyber Haven console?
Uh, Fernando. Yeah, I believe that's yes.
Awesome. Once you're logged in, you're going to go ahead and click on incidents. Uh, this is gonna be on the left hand side of your navigation bar. Looks like a little shield. There's gonna be a, there should be a little red indicator light, uh, next to that shield. Go ahead and click on that. Um, and from here you're going to see all of the incidents that we've, that we've generated so far.
The incident page is gonna display all incidents that occurred when a user action resulted in a policy response, such as blocked or warning, or if a policy was set to monitor and to create an incident. The top of the page is gonna show us a total number of incidents under each status type. And when you land on the incidents page, the open tab displays all of the open incidents, switch between the different tabs, um, to see the different status types.
Um, but for our, uh, for our demonstration today, we're going to utilize the open, uh, category.
Once everyone has reached the incidents page, we're going to select all, uh, in the incidents list. Um, and what we want to do is we want to find incidents that are associated to your rebel number. Um, if you recall, uh, at the beginning of our, uh, demonstration, there was a text document that indicated your rebel ID number.
Um, you can go ahead and search for rebel number under the host name. So if you hover over host name, you'll see three lines indicating a filter option. You can search for your rebel ID number, that way to see all of your incidents within the console.
Alicia, just wanna confirm, do a quick health check. I see some folks still running those filters.
Yeah, I heard the question. He's wondering how to get the host name. So he is in incidents. So there's a table below the open option. It'll be like open, closed, assigned. There's gonna be a list of columns from within that column. There should be a host name option.
Yeah, so you should click on host name right next to host name. There should be like three lines. That's the filter option. So you can search for Revel. Your Revel id.
Yeah, you can do it with the different columns, but not host name.
I.
Awesome.
Deep Dive: Lineage View, Related Events, and What Was Blocked
Cole Padula: Um, so once you've, once you've filtered down, uh, in looking for events that are associated to your red number, you'll be able to look at the summary data, destination, user policy, and dataset that your user account violated, um, during the exfiltration attempt. Um, below the, below the incident information, you're going to see some details around data lineage.
Um, here you'll see exactly where the file was sourced from, uh, and where you attempted to move that file to.
You can click on each one of these elements, the with the white text to learn a little bit more around where that file may have originated from
it.
You are close. Yep. Scroll down. Scroll down just a little bit.
Should be directly beneath the Linea summary.
Who was that? Alicia, Ty. You beat me to the punch, dude.
All good, man. Um, Alicia, you mind going on mute real quick? Oh. Thank you. Um, so once you've, uh, once you see the full lineage associated to the event, um, you can expand out other additional elements of this specific incident. So you can expand out, show X related events. Um, here you're gonna see the full lineage of this file, um, where it originated from other users that may have interacted with it, um, as well as blocking attempts, which is, which is highlighted by a red banner, um, when a user may have, uh, moved a file to a destination that the security team has defined as a risk.
Again, in each one of these, uh, events, you can click into different elements to learn a little bit more around the metadata that Cyber Haven is capturing, um, when it's monitoring these data actions across all of your managed endpoints.
AI+ Policy Incidents: Linea Risk Summaries & Why It Matters
Cole Padula: Once we've reviewed the incidents that we've captured, we wanna review a little bit deeper around some of the incidents that we may not have stopped. Um, this is where Linea plus AI Linea can step in and identify potential incidents where we're not actively blocking users from performing actions, but based on the flow of data, Linea has identified a potential risk and wants to elevate this information to security analysts or administrators of the Cyber Haven, uh, solution.
We can look at these linea incidents by going to our ribbon, um, in that incidents table. So just above where you selected host name, there's going to be a gray ribbon towards the right hand side of that ribbon, there's going to be an AI plus policy incidents, um, button. You're going to go and click on that, and that's going to bring you to a separate, uh, uh, table, um, within the incidents page.
I'm gonna stop here really quick. Um, and I'm gonna have Alicia just take a quick temperature check.
Awesome.
So this is a fast path from detection to prevention and line's gonna help you understand not just what happened, but why. So you can click into each one of these separate incidents to understand why Linea is surfacing this as a potential. Uh, risky event. Um, here you'll see things like a linear AI generated risk summary, which gives you information around where users may have sourced the data from.
It'll provide additional analysis on the data itself, um, which you can view utilizing that view content summary. Um, it'll give you information around the data, what that data may have contained, as well as information around the destination. And then directly beneath that, you'll see information around the lineage where, where you, the mos now acting as the rebel security administrators, uh, can see the lineage as to how these users were interacting with the data at the time of the incident.
So, awesome. Uh, I. Eric, quick, quick check. You said that the gold cast is going to end in six minutes. Um, is that correct?
Oh, okay. Um, I think this next section is going to take at least 10 minutes. Do you wanna stop here for q and a?
Yeah. Yeah, absolutely.
Designing Protection Policies in Object Management (Block Risky Paths)
Cole Padula: So where we take individuals that participate in the hands-on lab from here, um, is we walk through, um, what we just learned from generating, uh, from learning more about the linear plus, uh, the AI plus policy incidents. Um, so at this point we've analyzed behavior and context. We're going to take this information and design a protection policy that blocks the risky paths that we observed during our investigation.
Um, so from here where we usually, where we go, um, within the console is we take individuals into object management. Um, which many of you are may be familiar with. Risk overview. Um, this is a, this is part of a user interface overhaul that we've done within the last few releases. From here, we, we, we take, uh, we take individuals through how you can go about creating a new policy with this new, um, with this new UI format.
Once you, when you create policies within object management, you get realtime insights, um, based on the criteria that you set out, uh, uh, around the, uh, around the policy itself. So in this case, we're taking data, um, and we're, we're telling Cyber Haven, Hey, we wanna block flows to places like chat, GPT file.io.
Um, as we search for these elements within object management, over here on the right hand side where it says performance, we get realtime analytics based on historical insights. So we're using the data that Cyber Haven, the flight recorder, captures displaying to the administrator, Hey, this is how effective this policy would be, um, in a real world scenario.
You can see that here on this slide that I'm showing now. After we create this protection policy, we enable it. Um, so, you know, taking the work that we've done, pushing it out into production so that in the future when other molds that might be, that might have infiltrated the Rebel Alliance, uh, attempt to steal data in this manner, uh, cyber Haven is going to step in and prevent those users from stealing that data.
Um, same process. We would go through object management. We would convert, we would flip this, this, the toggle switch, um, from off to on for the rebel number that they are associated to. Um, so for, uh, for tie rebel nine protection policy, he would go ahead and flip that to on, and if he, if his user attempted to perform that action again in the future, that user would get blocked.
Insider Risk Management: Risk Scores, Groups, and Wrap-Up Q&A
Cole Padula: Finally, we wrap up around, we wrap up around insider risk management. Um, so, uh, through all these different events, um, these, uh, these individuals are calculating risk scores, um, that we can display to, um, administrators of Cyber haven, uh, to tell 'em a little bit more who the riskiest. Rebels might be at the organization.
This can help you surface potential mos, um, before they become true threat actors. Um, if Cyber Haven is stepping in and our policies are configured correctly, um, we're going to identify our riskiest individuals faster utilizing insider risk module. From here, we jump into the insider risk page if you'd like to follow on and learn a little bit more.
That's a little person icon within the, within the Cyber Haven console, just beneath the four bars going up and down in our incidents shield. Um, from here we'll see all of the different users that were a part of the class. Um, our riskiest users are gonna be at the top. So the folks that may have been, you know, triggering a few different alerts or trying a few different workflows throughout the class.
Those would be our riskiest users and our riskiest employees in this case. Um, we like to think of this as our command center for monitoring risky behavior from within the organization. Um, everything is color coded, um, and documented based on our risk score. On the right hand side, we get some quick hits.
What has this user's risk score been over the last 7 30, 60, 90 days, as well as what is the most, what is the data types that they're actively working with? In this case, they're actively utilizing, you know, top secret hologram data that we're going to use to, you know, blow up some empire base somewhere.
We're always fighting with one another. Um, and then from here we talk about creating manual risk groups. So we assign folks to potential leavers groups, um, you know, individuals that might be leaving the organization or people that we may have identified as a threat. Um, we have, uh, our rebels associate this to their rebel group id.
Um, once they've done that, we add that user to that group. We amplify their risk, um, utilizing a multiplier, uh, that we associate to that risk group. So in Ty's case, rebel nine User Group, we associate a, you know, a risk multiplier for Ty's risk score is now elevated, um, utilizing the historical context of previous events and any future event that he might trigger in the future.
Once all that's done. You've officially saved the galaxy. Um, and, uh, from here, uh, we, uh, we clap. We, uh, Caitlin likes to give out a little popcorn maker. Um, and then finally what we'd like to do, um, is uh, you know, have, have a little q and a session. Um, for today our competition is going to be, um, be furthest drive at Topgolf, uh, wins a prize.
Eric is gonna line that up. Um, he did not know that, but I'm greenlighting it right now. Um, and shortest drive gets a punishment that I will determine. Um, so Silas, I'm looking at you. I know you don't play golf. Um, yeah, that's it guys. Um, and if there are any questions, I'm happy to answer asynchronously.
Actually, Eric, if I kill this presentation in Gold cast, I can answer questions in Zoom or do you have to go.
.avif)
.avif)